
ARTICLE
[GUIDE] How To Create Post-Donation Social Media Buttons

According to a global survey by SurveyMonkey and Social@Ogilvy, the number one reason social media users share content is to “promote a cause.”
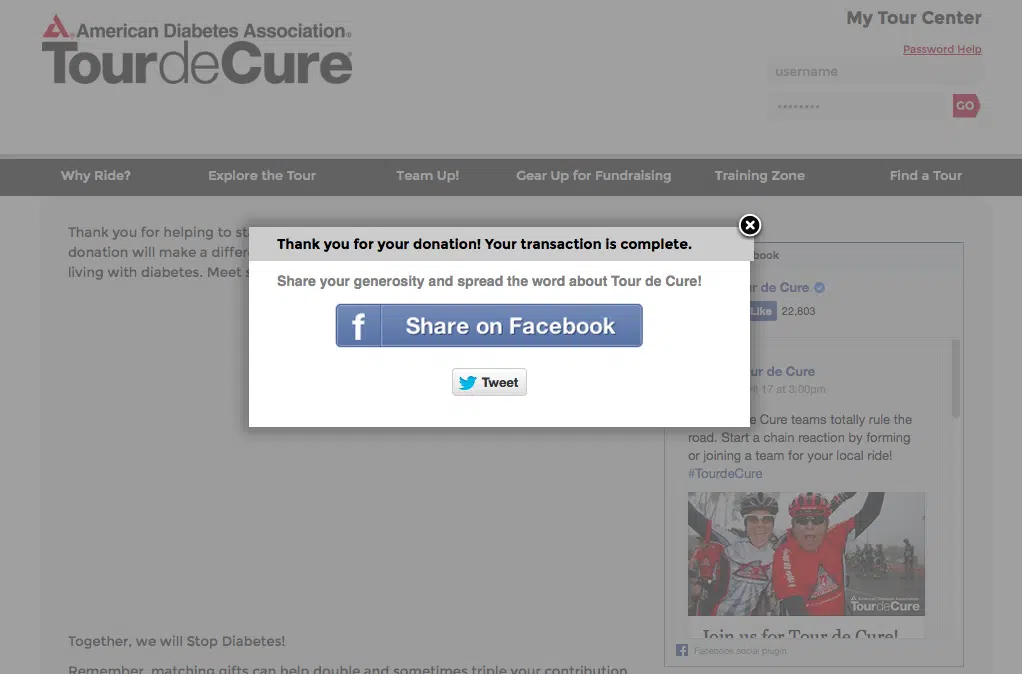
Savvy nonprofits are tapping into this predisposition on the part of donors to put their philanthropy on display. One of the best places to do so is right on the donation confirmation page; the page that a donor is automatically redirected to immediately after making a donation.
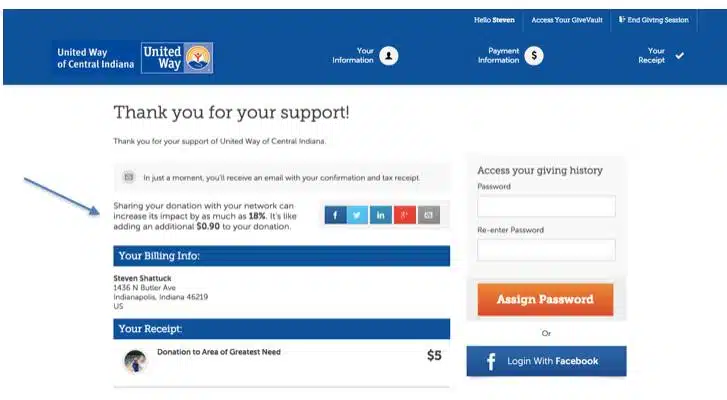
You can see that this page prompts the donor to “share their donation with their network.” Each button opens up a pre-populated status update or tweet.
If your online giving tool doesn’t come with the ability to customize post-donation content, or if you’re using a custom-made donation confirmation page, you can easily create a Twitter and Facebook button of this kind yourself. Here’s how:
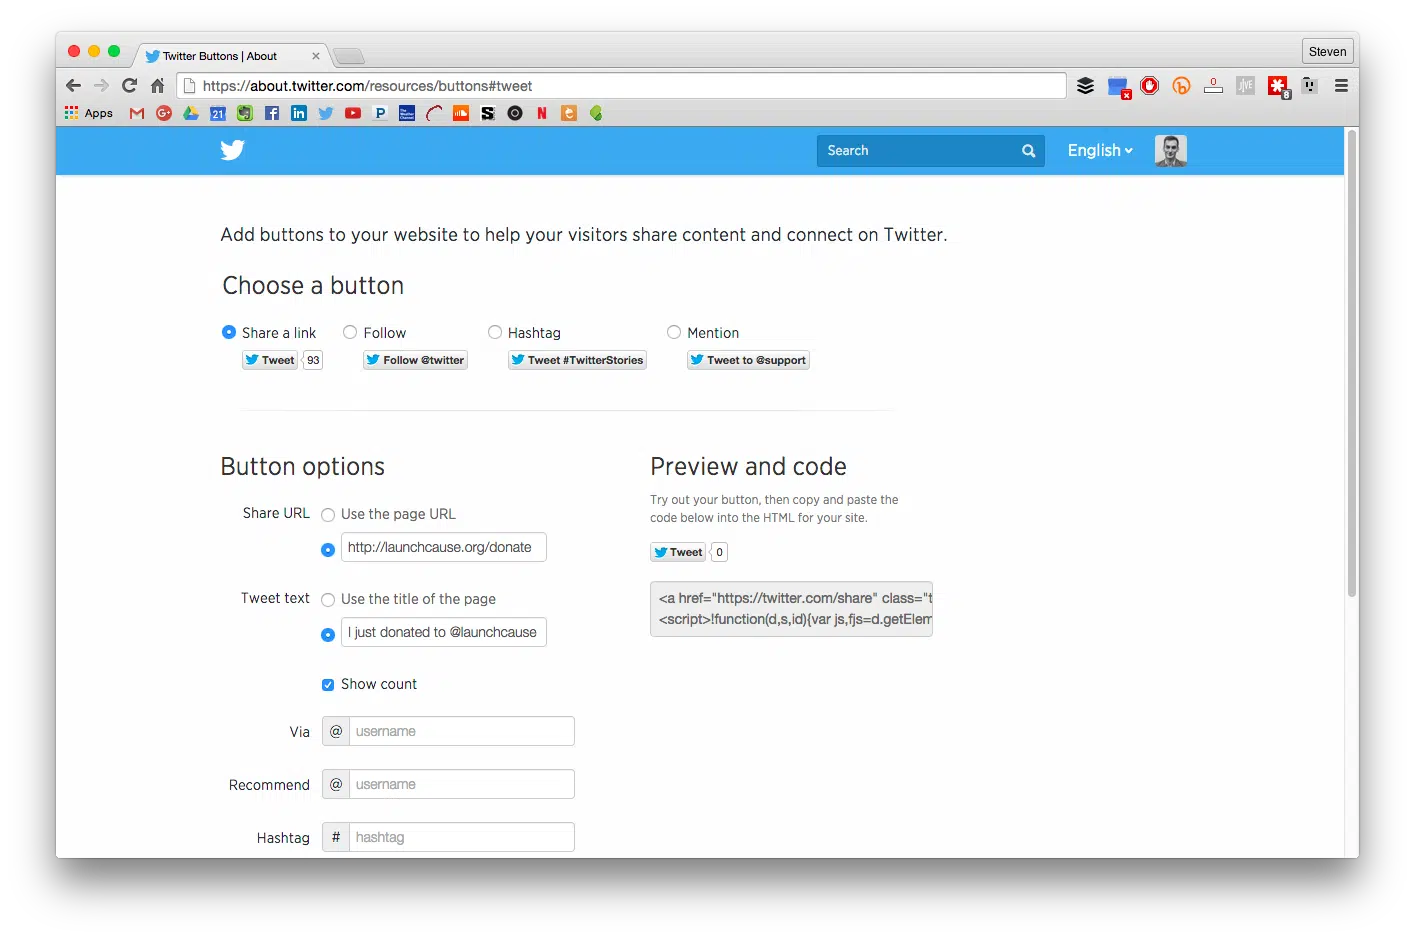
Twitter allows you to entirely pre-populate the content of a tweet, including a link. They have a slick creator that includes the button image here: https://about.twitter.com/resources/buttons
Once you fill in the link, tweet text and optional usernames or hashtags, Twitter will provide a line of code that you can paste onto your confirmation page. Easy!
Facebook is a little different from Twitter, in that you can’t pre-populate the message itself. But you can create a new post that includes a link to the page of your choosing. Once clicked, the user can write in their own message.
Just visit https://developers.facebook.com/docs/plugins/share-button to use their free button creator.
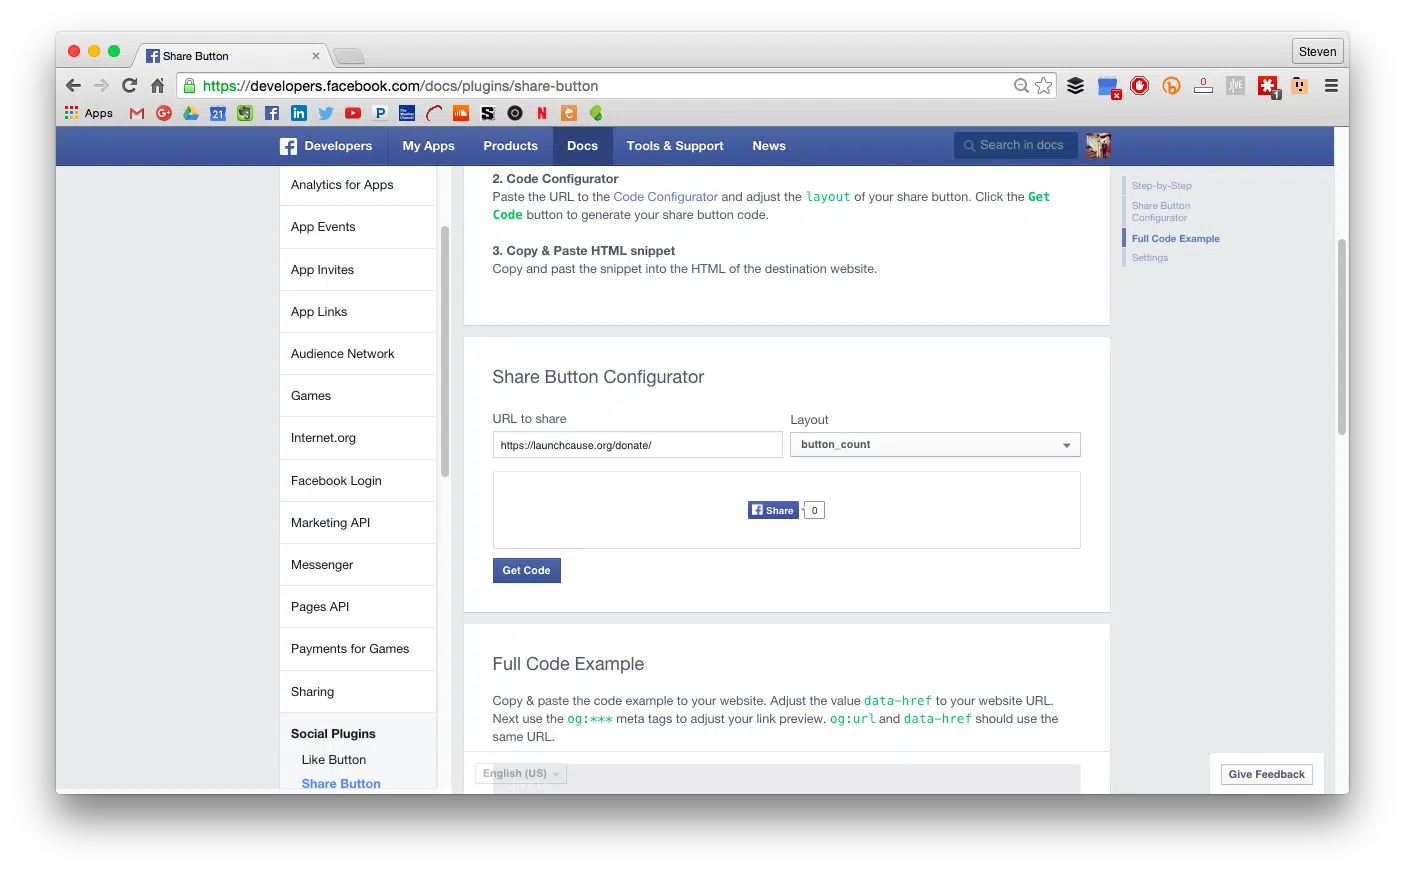
Once you choose your button style and URL, Facebook will generate two lines of code:
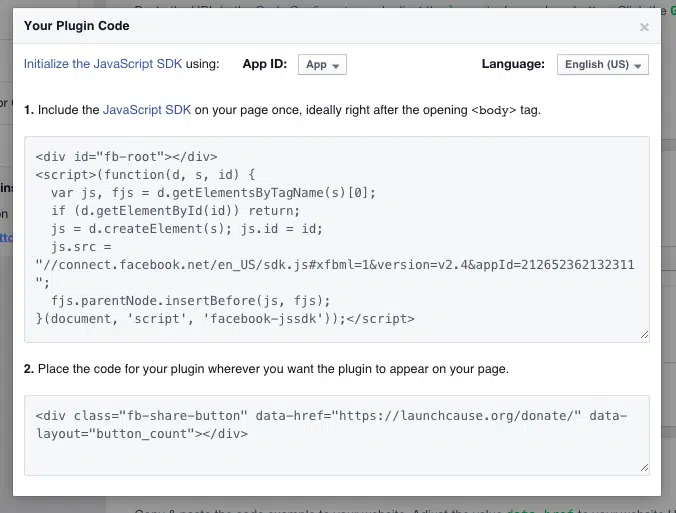
If you’re using WordPress or another CMS, you can add the first line of code to the “header” file, which will add it to every page of your website. If not, you’ll have to add it to every page you want to put the actual button on.
Then, simply add the second line of code to your confirmation page where you want the button to appear.
If you want to avoid that first line of code, you can manually create a Facebook share button. You’ll need your own button image for this method. Just use this code:
<a href=”http://www.facebook.com/share.php?u=http://yoururl.org“><img src=”http://yoururl.org/facebook_icon.png” border=”0″ /></a>
The bold lines above are what you need to change.
If don’t want to use an image, you can instead use a clickable line of text:
<a href=”http://www.facebook.com/share.php?u=http://yoururl.org“>Click here to share your gift on Facebook!</a>
That line of text will appear as:
You can see that the URL is automatically populated and that the sharer can write in their own status update to accompany it.
Email receipts are an excellent place to utilize text links like the one above.
You can do something similar for LinkedIn and Google+, but wouldn’t necessarily recommend it for two reasons:
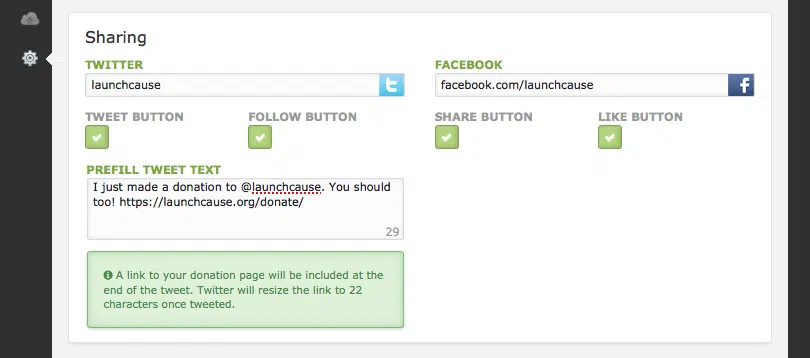
If you’re using Bloomerang and don’t have a dedicated donation confirmation page, you can easily add social media buttons to your donation confirmation message:
Now that you know how to create the button, it’s time to think critically about what you actually want them to do. You have three elements to think about:
The supporting content should be as enticing as possible. In the United Way example above, you can see they tie the share to an actual economic impact. Check out what Tour de Cure says on their confirmation message:
Next, you have to choose a URL.
It’s a little presumptuous to assume that someone is going to see this status update, visit your donation page and immediately make a donation. Instead, consider creating a page just for this button. Maybe it’s something like www.nonprofit.org/besocial that has some content that talks a little about what your organization is and does (just in case the visitor is completely new). You could include a video or even a donor profile. This page should have a form that the visitor can convert on.
Finally (for Twitter only) you can craft the content of the tweet. Don’t forget that you’re limited to 140 characters, including the URL, so brevity wins out here. Remember to write it from the perspective of the donor: “I just gave to @organization! You can learn more about them here: www.nonprofit.org/besocial.”
As with most digital assets, the button text and URL are great things to measure and adjust.
Don’t be afraid to take advantage of a donor’s propensity to brag about their giving!
Do you have social share buttons on your donation confirmation message or page? Let me know in the comments below!
Proper donor data management is tough, but it doesn’t have to be impossible. That’s why we’ve created a new eBook: Data That Changes The World – Your Guide to Building, Maintaining & Leveraging an Effective Nonprofit Database.


Comments
How not-for-profits can tap into their digital communication advantage – Kate Rolland
7 Tips To Creating A Successful Year-End Donation Page (Part 1: The Right Content) - Wanna Pixel
hamza
m
Erik
Greater News - September 2015 | Greater Nonprofits